Feast with Friends #CooknScribble #Foodstories

What happens when a community of food writers gathers together under one roof? Well, they cook, they write, and they eat. Last week, under the literary and culinary auspices of CooknScribble, a virtual tribe of writers, storytellers, documentarians, and artists, united by their passion for food, gathered in Venice Beach to do what they do best: cook, share, teach, and, of course, eat. Very well.

cook menu

This was easily achieved. Chef Kian Lam Kho, Chinese chef extraordinaire,  cooked up an Asian feast, with delectable recipes from his IACP award winning cookbook Phoenix Claws and Jade Trees: Essential Techniques of Authentic Cooking, along with a little inspiration from Shannon Kinsella, chef, writer and Culinary Development Manager of Gourmet Garden. We were in for a treat.

cook chef

cook book kim
While Kian displayed his cooking techniques and knife skills (as he masterfully prepared a meal for 20), content soothsayers Libbie Summers, Irvin Lin, Amy Halloran, and Leah Komaiko were on hand to give realtime video, photo, styling, interviewing, and branding tips. Meanwhile, the kitchen sizzled and grew steamy and fragrant.

IMG_2353

cook devour
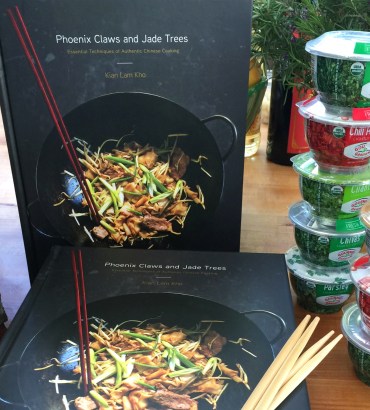
Patience was a necessity. As the massive wok heated up, the intoxicating aromas of ginger, lemongrass, chile, and garlic, transmuted into a swirling dervish of scent and steam, ramping up hunger and dissolving self restraint. To pass the time and deter the urge to scarf down Kian’s mise en place, we got busy practicing our styling and photo skills with products supplied by Gourmet Garden, Elevate Superfoods, and Kerrygold.

Continue reading “Feast with Friends #CooknScribble #Foodstories”

Hearty Chili with Bison, Black Beans, and Barley

bison chili tastefood

This is a chili template. You can follow it and substitute your favorite meat or even make a vegetarian version by skipping the meat step. In this chili I went all in, combining bison, black beans, and barley. If you haven’t tried bison I encourage you to try it. Bison is leaner, lower in cholesterol, and more rich in protein and Omega 3’s than beef. Other proteins such as beef chuck, pork, chicken or turkey can be substituted. If you prefer a vegetarian option, you can double up on the beans instead. Then there is the barley – I had a bag of gorgeous purple heritage barley from the farmers market I couldn’t resist adding to the stew. It adds heft and extra nutrients to this already hearty stew. You can omit the grains and add more beans. You get the idea!

Bison, Black Bean and Barley Chili
Serves 4 to 6

2 tablespoons olive oil
2 pounds bison meat, cut into 3/4-inch chunks
Salt and freshly ground black pepper
1 large yellow onion, chopped
1 large poblano pepper, diced
1 large red bell pepper, diced
3 garlic cloves, minced
2 to 3 chiles in adobo, chopped
1 tablespoon chili powder
1 teaspoon ground cumin
1 teaspoon sweet paprika
1 (28-ounce) can Italian plum tomatoes with juice
8 ounces stout beer, such as Guinness
1/4 cup tomato paste
2 bay leaves
2 tablespoons brown sugar
1  cup pre-cooked black beans (or 1 [15-ounce] can black beans, drained and rinsed)
1 cup pre-cooked barley (I used purple heritage)

Garnishes:
Sliced jalapeño pepper, cilantro leaves, crumbled cotija cheese, chopped red onion

1. Heat 1 tablespoon oil in a Dutch oven over medium-high heat. Season the meat with salt and pepper. Add to the pot in batches and brown on all sides. Transfer to a plate.
2. Add 1 tablespoon oil to the same pot. Add the onion and saute over medium heat until softened without coloring, about 3 minutes. Add the peppers and saute until brightened in color, about 2 minutes. Add the garlic and saute until fragrant, about 1 minute. Add the chiles in adobo, the chili powder, cumin, and paprika and cook, stirring, for 1 minute.
3. Return the beef to the pot and add the tomatoes, stout, tomato paste, bay leaves, brown sugar, and 1 teaspoon salt. Bring to a boil, then reduce the heat to medium-low. Partially cover the pot and simmer for 30 minutes, stirring occasionally. Taste for seasoning and add more sugar or salt if desired. Stir in the black beans and barley and continue to simmer for 10 more minutes.
4. Ladle the chili into serving bowls. Serve with the garnishes for sprinkling.

Lisbon Snapshots #TasteFoodTravel

Afternoon Light - Casa de Pasto
Casa de Pasto
Cevicheria
Cevicheria

Rooftop Sunset

Sao Roque
Sao Roque
Chiado Wine Bar
Chiado Wine Bar

Graffiti

LX Factory
LX Factory
Pastéis de Nata
Pastéis de Nata

Ginjinha

Simple Beef Stew Recipe

Beef Beer Stew TasteFood

Here is something for your winter dinner rotation: Chunky root vegetables and slow-cooked beef swimming in a stock of beef and beer. This hearty no-nonsense beef stew is a must-have for a dreary winter night. Make a double batch over the weekend, and stretch it out over a few meals. It isn’t fancy, but it’s satisfying and delicious. Consider it a down-to-earth respite between holiday indulgences.

Simple Beef Stew

The stew tastes even better after a night in the refrigerator. Serves 4 to 6.

3 pounds beef chuck, excess fat trimmed, cut into 1 1/2-inch pieces
Salt
Freshly ground black pepper
3 tablespoons olive oil
, divided
3 cloves garlic, chopped
1 1/2 cups dark beer, such as Porter, divided
3 tablespoons tomato paste
2 cups beef stock
1 bay leaf
1 tablespoon brown sugar
1 teaspoon dried thyme
2 medium carrots, sliced 1/4-inch thick
2 medium yellow onions, each cut into 8 wedges
2 medium Yukon gold potatoes, cut into 1-inch pieces

1. Preheat the oven to 325°F. Season the beef with salt and pepper.
2. Heat 1 tablespoon oil in a Dutch oven over medium-high heat. Add the beef in batches in one layer, without overcrowding, and brown on all sides. Transfer the meat to a plate and repeat with remaining beef.
3. Pour off all but 1 tablespoon fat from the Dutch oven. Add the garlic and sauté over medium heat until fragrant, about 30 seconds. Add 1/2 cup beer to the pot and bring to a boil, scraping up any brown bits with a spoon. When the beer is nearly evaporated, add the tomato paste and cook, stirring, about 1 minute. Return the beef to the pot and stir to coat.
4. Add the stock, 1 cup beer, the bay leaf, sugar, thyme, 1 teaspoon salt, and 1 teaspoon black pepper. The meat should be just covered with liquid. If not, add additional stock to cover. Bring to a boil, then cover the pot and transfer to the oven. Cook until the meat is tender, about 2 hours, stirring occasionally.
5. While the meat is cooking heat 1 tablespoon olive oil in a large skillet over medium heat. Add the carrots and onions and lightly season with salt. Sauté until the carrots brighten in color and the vegetables begin to soften, 2 to 3 minutes.
6. Add the carrots, onion, and the potatoes to the stew and stir to combine. Return to the oven and cook, partially covered, until the vegetables are tender and the sauce slightly thickened, about 45 minutes, stirring occasionally.
7. Serve warm ladled into bowls.


Ploughman’s Grilled Cheese Sandwich with Apple Chile Chutney

Grilled Cheese TasteFood

The Art of Cheese with Castello Aged Havarti

Once upon a time I lived in England.  I have many takeaways from that experience, and one of them is the ploughman, the ubiquitous pub lunch consisting of generous slabs of cheese served on a platter with bread, fruit, chutney, and pickles. In my opinion, the combination is a perfect meal: sharp aged cheese, a smear of spiced fruity chutney, perhaps a dab of strong mustard, and wedges of apple stacked onto thick slices of country style bread.

I couldn’t help but think of the ploughman when I  was recently invited to contribute a recipe incorporating or accompanying Castello’s Aged Havarti Cheese. Castello is near and dear to my heart – a brand I know well from Denmark, so I was eager to step up to the task. I was also eager to try their aged rendition of havarti, which, trust me, is not  your generic mild havarti. Nutty, piquant and dense, I easily pictured it with a dollop of robust chutney. As timing would have it, I like to make chutneys during the holiday season to accompany a cheese platter. So for this challenge, I took inspiration from Piccallili, the English version of Indian pickles, which is frequently served with ploughman’s lunches – and made an apple chile chutney, then ramped everything up a notch by piling all of the ingredients into a hearty grilled cheese sandwich with fresh onion, baby kale leaves and sliced apple.

apple chutney tastefood

Ploughman’s Grilled Cheese with Apple Chile Chutney

Makes one sandwich

2 slices sourdough or ciabatta bread, 1/2-inch thick
Salted butter, softened
2 ounces sliced aged hard cheese, such as sharp Cheddar or Gouda
1/4 cup arugula or more as needed
2 tablespoons Apple Chile Chutney (recipe below)
2 teaspoons Dijon mustard, or to taste

Make the sandwich:
Butter one side of each bread slice. Heat a skillet over medium heat. Add one bread slice to the skillet, butter-side down. Lay the cheese over the bread. Cover the pan and cook until the cheese is mostly melted, 2 to 3 minutes. Place the arugula over the cheese. Spoon the chutney over the arugula. Spread the mustard over the unbuttered side of the second bread slice. Place the bread, mustard-side down, over the sandwich. Using a spatula, carefully flip the sandwich and gently press down. Cover the skillet and cook until the cheese is thoroughly melted and the bread is golden brown, 2 to 3 more minutes. Transfer to a plate, cut in half, and serve.

Apple Chile Chutney

Add a mix of mild and hot chile peppers for flavor and heat. I used a red jalapeño and sweet Hungarian and Gypsy peppers in this batch.
Makes about 2 cups.

1 tablespoon olive oil
1 yellow onion chopped
2 to 3 red chile peppers, depending on size and heat, stemmed and seeded, chopped (about 1 cup)
2 large Granny Smith apples, peeled, cored and diced
1 cup apple cider vinegar
1/2 cup golden raisins
1/3 cup brown sugar
2 tablespoons grated peeled ginger, with juices
1 teaspoon yellow mustard seeds
1/2 teaspoon turmeric
1/2 teaspoon freshly ground black pepper
1/2 teaspoon kosher salt

Combine all of the ingredients in a large saucepan. Cook over medium heat, stirring frequently, until the sugar dissolves. Continue to cook, stirring frequently, until the chutney thickens, about 20 minutes. Cool completely, then transfer to a jar and refrigerate. The chutney will keep in the refrigerator for up to 2 weeks.

Holiday Desserts: Cranberry Orange Trifle with Candied Walnuts

Here is a festive trifle that will carry you through the holidays – it’s a great do ahead party dessert with show-stopping results. Buttermilk poundcake is blanketed with layers of cranberry compote, orange infused mascarpone cream, and candied walnuts. Each bite is light and airy with the pop of sweet-tart cranberries and the crunch of cinnamon dusted nuts, so be sure to get a little bit of everything in each spoonful. The best part is this dessert can be assembled a day in advance, which leaves you plenty of time to take care of that turkey.

Cranberry Orange Trifle with Candied Walnuts

While there are several components to this trifle, each one may be prepared in advance, and each one is stand alone good, so feel free to use them on their own. Serve in a trifle bowl or individual goblets. Makes 8 to 10 servings.

For the buttermilk pound cake:
1 1/2 cups all-purpose flour
1/2 teaspoon baking soda
1/2 teaspoon salt
1 1/2 cups granulated sugar
1/2 cup unsalted butter, room temperature
3 large eggs, room temperature
1 teaspoon vanilla
1/2 cup buttermilk

Preheat oven to 325 F. (170 C.) Butter a 9-by-5 inch loaf pan. Line the bottom with parchment and butter the parchment. Whisk the flour, baking soda, and salt in a bowl and set aside.
Beat the sugar and butter in the bowl of an electric mixer until light and fluffy, about 3 minutes. Add the eggs, one at a time, beating after each addition. Stir in the vanilla. Add half of the flour, then the buttermilk, then the remaining flour, mixing well to combine after each addition. Pour into the loaf pan. Bake in the oven until a wooden skewer inserted in the center comes clean, about 55 minutes. Transfer to a rack and cool 10 minutes. Invert the cake onto a rack and cool completely. The pound cake may be prepared up to 2 days in advance. Wrap with plastic and refrigerate until use.

For the cranberry compote:
12 ounces cranberries, fresh or frozen
3/4 cup granulated sugar
1/2 cup freshly squeezed orange juice
1/2 teaspoon ground cinnamon

Combine all of the ingredients in a medium saucepan over medium heat. Cook, stirring occasionally, until the cranberries pop and release their juices. Remove from heat and cool completely. Refrigerate, covered, for up to 4 days.

For the candied walnuts:
1 1/2 cups walnut halves
1/2 cup sugar
1/2 teaspoon kosher salt
1/2 teaspoon ground cinnamon

Preheat the oven to 350°F. Arrange the walnuts on a baking tray and bake 10 minutes. Heat the sugar over medium heat in a small saucepan. As soon as it begins to dissolve, stir with a wooden spoon until the sugar is liquid and amber colored. Add the walnuts and stir to coat. Add the salt and cinnamon. Remove from the heat and pour the walnuts onto a baking tray lined with parchment or a silpac sheet. Cool completely then break into coarse pieces. Store at room temperature in an air-tight container for up to 1 week.

For the orange mascarpone cream:
2 cups heavy cream, chilled
8 ounces mascarpone cheese, chilled
2 tablespoons granulated sugar
1 tablespoon finely grated orange zest
1 tablespoon Gran Marnier or Cointreau
1 teaspoon vanilla extract

Combine the cream and mascarpone in the bowl of an electric mixer fitted with a wire attachment. Beat until traces of the whisk are visible. Add the remaining ingredients and continue to beat until soft peaks form. Refrigerate until use. (May be made 4 hours in advance.)

Assemble the trifle:
Reserve a few whole cranberries from the compote for garnish. Pour a thin layer of cranberry compote into the bottom of the trifle dish or individual serving glasses. Cut the pound cake into 3/4-inch cubes. Arrange a layer of pound cake over the compote. Top with a layer of cream. Sprinkle a few of the nuts over the cream. Repeat the layering process, finishing with a layer of cream and nuts. Garnish with reserved cranberries and finely grated orange zest. Serve immediately or refrigerate, covered, up to 4 hours before serving.

Optional: Brush each layer of pound cake with Cointreau or Gran Marnier for an adult version of this dessert.

Summer Bounty – Quick Pickles

fall picklesSummer Pickles – Posted by Lynda Balslev © 2014

When summer yields more vegetables than you can shake a stick at, it’s time to pickle. I adore pickles and for years shied away from trying to make my own. Why? Perhaps due to the time and labor, mixed with a little fear of failing. Well, quick pickling came to the rescue. For impatient types like me, this method requires minimal time and easy results.

Quick Summer Pickles

Shake up your pickles with a variety of veggies. Not only are they diverse to eat, they look very pretty in the jar. Small cauliflower florets, pardon peppers, baby carrots, green beans and fennel went into this mix. Of course you can also use cucumbers (kirby are best), zucchini, okra, or whatever else strikes your fancy.
(Just remember to pre-salt your cukes and zukes for 30 minutes, then wipe off excess moisture before brining.)

2 pounds veggies

Brine:
6 garlic cloves, smashed but intact
2 bay leaves
3 cups water
3 cups apple cider
1/4 cup sugar
3 tablespoons kosher salt
2 teaspoons black peppercorns
1 teaspoon fennel seeds
1 teaspoon coriander seeds
1 teaspoon brown mustard seeds

Wash and trim the vegetables as needed. Tightly pack into clear heatproof jars.
Combine the brine ingredients in a saucepan. Bring to a boil, stirring until the sugar and salt dissolve. Pour the brine over the vegetables. Cover and cool to room temperature. Refrigerate at least 24 hours or up to 1 week. The flavors will develop with time.

A Grill and a Skillet: Yogurt Marinated Chicken Breasts with Tomatoes and Chickpeas

Chicken grill When the weather gets all hot and in your face, it helps to shout back. Fire up the grill, douse your food with loads of spice and fight fire with fire. What I love about this method is that not only is the food intoxicatingly flavored with aromatics, spicy heat and char, all of the cooking remains outside on the grill. In this recipe, chicken is swathed in a creamy-smoky-spicy bath that permeates and tenderizes the meat as it marinates. While the meat grills to crispy perfection, a basket of cherry tomatoes cooks down to a sweet sludge dotted with nubby chickpeas, which becomes the bed for the finished chicken. It’s served with couscous to absorb the rich pan juices and topped with a dollop of fragrant yogurt sauce. Bright, spicy and very shouty, indeed.

Yogurt and Spice Marinated Chicken Breasts with Tomatoes and Chickpeas

Serves 4 to 6.

Marinade:
3 garlic cloves, minced
1/4 cup Greek whole milk yogurt
2 tablespoon fresh lemon juice
2 tablespoons extra-virgin olive oil
1/2 tablespoon smoked paprika
1/2 tablespoon sweet paprika
1 teaspoon ground cumin
1 1/2 teaspoons salt
1/2 teaspoon freshly ground black pepper
1/2 teaspoon cayenne

4 large chicken breasts with skin, de-boned, about 8 ounces each

1 pound grape or cherry tomatoes
1 (15-ounce) can chickpeas, drained and rinsed
1/2 cup fresh cilantro sprigs
1 garlic clove, minced
1 tablespoon extra-virgin olive oil
1/2 teaspoon cumin
1/2 teaspoon crushed red pepper flakes
1/2 teaspoon salt

Sauce:
1/2 cup whole milk Greek yogurt
1 tablespoon chopped fresh cilantro

Prepare:
1.  Whisk the marinade ingredients in a small bowl. Transfer 1 tablespoon of the marinade to another bowl and set aside for the sauce.
2.  Place chicken in a rimmed baking dish. Rub all over and between skin and meat with the marinade. Cover and refrigerate for at least 2 hours or overnight.
3.  Prepare the grill for direct and indirect cooking over medium heat.
4.  Heat the oil in a large cast iron skillet over indirect medium heat. Add the tomatoes and cook until they just begin to break down and release their juices, about 10 minutes, stirring occasionally. Add the garlic, chickpeas, cilantro, cumin, red pepper flakes and salt. Cook until the tomatoes collapse and the sauce thickens, about 10 more minutes, stirring occasionally.
5. While the tomatoes cook, remove the chicken from the marinade and discard the marinade. Grill the chicken, skin side down, over direct medium heat, until cooked through, turning once. Remove from heat.
6. Whisk the reserved marinade with 1/2 cup yogurt and fresh cilantro.
7. Cut the chicken breasts in half crosswise. Nestle into the skillet with the tomatoes and chickpeas. Serve with the yogurt sauce.

This dish and its many iterations I’ve enjoyed making is originally inspired by a recipe from Bon Appetit. 

Crispy Prosciutto

Crispy Parma tastefood

Do you like crispy bacon? Then try making crispy prosciutto. Oven baking slices of prosciutto (or any other dry cured ham) transforms supple ham slices into crunchy shards ready for munching or crumbling over salads, soups, pastas and vegetables. Baking dehydrates the meat, concentrating its flavor and intensifying its saltiness while cooking off excess fat. The resulting wizened slivers of dried pork add a punch of flavor to almost anything and taste great as simple finger food. I call these salty snippets crack-croutons because they are highly addictive and intensely flavorful. 

Crispy Parma Slices Lynda Balslev

Oven baking is a great way to use up any leftover parma, coppa or prosciutto in your fridge – if you’re lucky enough to have leftovers. If not, the method is so easy and quick it justifies shopping for a whole package to open and pop into the oven. And you don’t have to spring for the expensive stuff – any thinly sliced dry cured ham will do. I often use German prosciutto from Trader Joe’s that’s half the price of the Italian equivalent. 

crispy parma cru Lynda Balslev

To crisp the ham, arrange the slices in one layer, without overlapping, on a baking sheet lined with parchment paper. Bake in a 350°F oven for 15 minutes, then turn off the heat and let the ham stay in the oven for another 10 minutes. Remove and cool, then break into shards. The crispy ham will keep in a covered container in the refrigerator for up to one week – but I promise it will be long gone by then.

Five ways to use crispy prosciutto:
1. Scatter over mixed salads.
2. Sprinkle over creamy soups and chowders.
3. Garnish eggs and frittatas.
4. Crumble the shards and use to season cooked vegetables.
4. Add to cheesy pasta dishes and homemade pizzas before serving.

Rosemary and Porcini Crusted Lamb Loin Chops

Lamb tf

A rub of crushed dried porcini mushrooms and finely chopped rosemary creates an umami-rich crust for lamb. I use a food processor to blitz the mushrooms before continuing to chop them by hand with the rosemary, resulting in a coarse rub. A spice grinder will create a finer crust.

Lamb cru tf

Porcini and Rosemary Crusted Lamb Loin Chops

Serves 4.

8 lamb loin chops, each about 1 inch thick
Sea salt
Freshly ground black pepper
3 tablespoons olive oil, divided
1 large garlic clove, minced
1/4 cup finely ground dried porcini mushrooms
1 tablespoon finely chopped rosemary leaves

Season the lamb with salt and pepper. Combine 2 tablespoons oil and the garlic in a bowl and smear all over the lamb. Cover with plastic wrap and refrigerate for at least 2 hours or overnight.
Thirty minutes before roasting, remove the lamb from the refrigerator. Combine the mushrooms and rosemary in a small bowl. Coat both sides of the lamb with the rub and let stand at room temperature for 30 minutes.
Preheat the oven to 375°F (190°C). Heat 1 tablespoon oil over medium-high heat in a large ovenproof skillet. Add the lamb to the pan without overcrowding. Cook until brown on both sides, 3 to 4 minutes per side. Transfer the skillet to oven. Bake until cooked to your desired doneness, about 10 minutes for medium-rare. Remove from the oven, tent with foil, and let rest 15 minutes before serving.